Setting up staging site
Having a site to test website changes are a important part of doing professional website operation and development. This is to prevent doing experiments on production sites, such as code changes or plugin updates. If something bad happens, such as faulty plugin or errors in code, it will affect or even take the production site down, which is very rarely a good experience and may cost at lot of money.

The way to get a site to test on can be accomplished in multiple ways, such as:
- Staging site - Running on same hardware/software as production site
- Local development environment - Typically different hardware/software
To do the best possible test, a staging site running on the same environment as production site is the best solution, as they are most similar. Using a local development environment to do testing on, is still a way better solution than not testing at all.
In this guide, we will focus on setting up a staging environment with WP Synchro, but check out our guide on creating a local development environment.
So lets get started.
Importance of staging site
Having a staging site, you will be able to test different changes, before using it in production. This can be:
- Test WordPress & plugins updates
- Test code changes
- Try out new plugins and themes
Always test changes done to a production before deploying them.
Establish the base staging site
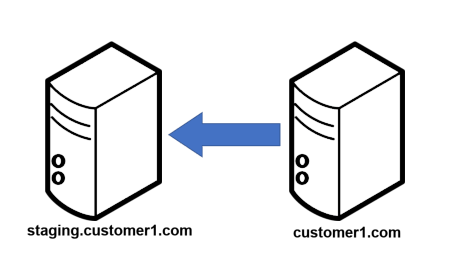
To get started with a staging site, you first need to establish a empty WordPress installation on a proper domain. This is normally something like staging.example.com, where the production site is example.com.
How this can be done, depends very much on what kind of hosting you have. Normally it can be done in the administration of your hosting.
This should give you a brand new WordPress site with nothing on it. On this you should install WP Synchro as the only plugin.
Doing the initial clone of production site

To get the initial copy of the entire site, you have multiple options, such as:
- Use WP Synchro PRO (PRO is required to also migrate the files)
- Use tools provided by your hosting
- Manual move files via FTP and export/import SQL
If you are using WP Synchro PRO to create the initial migration, you would login to your new staging site and go to WP Synchro overview.
Here you will create a new migration, with the type "pull". On the "Data to synchronize" section of the set up, you would choose "Migrate entire site" and then save.
When running this, it will migrate everything on the site, except WordPress files. So the entire database, plugins, themes, uploads etc. will be moved from production to your new staging site.
Depending on your site size, this can take a while the first time. If you run it multiple times, if will only move the files that have changed.
After migration, check which plugins are active. You may have to be careful with some plugins, as they may interfere with the production operation. Lets say you have a plugin that sends out emails based on customers. You will probably need to disable this plugin or install another plugin to disable outgoing emails.
Keeping the staging site up to date
When you have a working staging site, you will want to keep this up to date with the changes on the production site.
Luckily, that is super easy with WP Synchro, as you just run the already configured migration and then wait until it has completed. It will migrate database and migrate files, so it will be identical to the production site again.
If you have a very large site, it is suggested that you create another migration, which only migrates what you need, instead of everything.
Example: You have a very large news site and want to create a fast migration. In this case it can probably be enough to migrate the database and the /wp-content/uploads folder to get the uploaded media.
Doing tests on staging site
The whole purpose for our staging site is to test changes before they go to production. So what is the process during test?
Pretty simple actually:
- Make sure staging site is synchronized
- If not, run migration
- Do your code tests, plugin updates, theme update, WordPress updates or whatever you are testing
- Verify that everything works as expected
- Deploy the changes to your production environment
Rinse and repeat every time you want to test something.
So there you are, now you have a staging environment running with WP Synchro.
Still using free version? - Upgrade to PRO with 14 day free trial
PRO version makes it possible for you to migrate files between your sites and to
automatically make a database backup before migration.
You will get support for Basic Authentication and email notifications on success or failure. You also get access to priority support